
Do you want to take stunning photos but only have your phone camera? You’re in the right place! This article, “Elevate Your Mobile Photography: Simple Tips for Using Your Phone Camera Like a Pro,” will provide you with practical and easy-to-follow mobile photography tips to transform your everyday snapshots into professional-looking images. Learn how to harness the power of your phone’s camera to capture breathtaking landscapes, compelling portraits, and everything in between. Whether you’re a beginner or looking to refine your phone camera skills, these simple tips will help you unlock your creative potential and take your mobile photography to the next level.
We’ll cover essential aspects of mobile photography, from understanding composition and lighting to mastering your phone’s built-in features and exploring simple editing techniques. Discover how to make the most of your phone camera’s settings and unlock its hidden capabilities. By the end of this article, you’ll be equipped with the knowledge and confidence to capture captivating images that rival those taken with dedicated cameras. Get ready to elevate your mobile photography and impress yourself and others with your newfound skills.
Understanding Your Phone’s Camera Settings
Taking truly stunning mobile photos goes beyond simply pointing and shooting. Familiarizing yourself with your phone’s camera settings is the first step towards unlocking its full potential. Understanding these settings allows you to take control of your image and achieve the desired outcome.
Begin by exploring the resolution settings. Higher resolution captures more detail, which is crucial for printing or cropping. However, higher resolution files also take up more storage space. Find a balance that suits your needs.
Next, delve into the aspect ratio. This refers to the proportional relationship between the width and height of an image. Common aspect ratios include 4:3, 16:9, and 1:1 (square). Experiment to see which best complements your subject.
The grid feature can be a valuable tool for composing your shots, helping you adhere to the rule of thirds and maintain a straight horizon.
Finally, investigate other settings like timer, HDR (High Dynamic Range), and white balance. These options can greatly influence the final look of your photograph, offering control over exposure and color accuracy.
Mastering Composition and Lighting for Stunning Photos
Composition and lighting are the cornerstones of captivating photography. Understanding how these elements interact can dramatically improve your mobile photos.
The Rule of Thirds
Imagine your screen divided into nine equal parts by two horizontal and two vertical lines. Placing your subject at the intersection of these lines, or along them, creates a more visually appealing and balanced image. This is the rule of thirds, a fundamental guideline in photography.
Leading Lines
Use leading lines, like roads or fences, to draw the viewer’s eye towards your subject. These lines create a sense of depth and perspective, adding interest to your composition.
Natural Light is Your Friend
Whenever possible, utilize natural light. Avoid shooting in harsh midday sun, which can create overly bright highlights and dark shadows. The golden hours (sunrise and sunset) offer soft, diffused light ideal for photography.
Backlighting and Silhouettes
Experiment with backlighting by positioning your subject in front of a light source. This can create striking silhouettes or dramatic highlights.
Exploring Different Shooting Modes
Modern smartphone cameras offer a variety of shooting modes beyond the standard auto setting. Understanding these modes can significantly enhance your creative control and the quality of your photographs. Taking the time to experiment with these different options can unlock your phone’s photographic potential.
Common Shooting Modes and Their Uses:
Panorama: Ideal for capturing expansive landscapes or cityscapes. This mode stitches together multiple images to create a wide, seamless photo.
Portrait Mode: Designed for capturing portraits, this mode creates a shallow depth of field, blurring the background and emphasizing the subject. Experiment with adjusting the blur intensity for different effects.
Night Mode: Specifically designed for low-light conditions. This mode utilizes advanced algorithms to brighten the image and reduce noise, resulting in clearer night shots. A steady hand or tripod is often recommended.
Pro/Manual Mode: This mode grants you control over settings like ISO, shutter speed, white balance, and focus. It offers the greatest level of creative flexibility, allowing you to tailor settings to specific scenes and lighting conditions.
Time-Lapse: Captures a series of photos at set intervals and compiles them into a video, showing the passage of time in a compressed format. Excellent for capturing slow-moving events like sunsets or cloud formations.
Utilizing Focus and Exposure Techniques
Focus and exposure are crucial for capturing professional-looking images with your phone. Mastering these techniques will significantly improve the quality of your mobile photography.
Tapping to Focus: Most phone cameras allow you to set the focus point by simply tapping the screen. This tells the camera what part of the scene should be sharp and clear. Experiment with focusing on different elements within the frame to create depth and draw attention to your subject.
Exposure Compensation: Your phone likely offers a way to adjust the exposure, brightening or darkening the image. This is typically represented by a sun icon. Increase the exposure for brighter images and decrease it for darker, moodier shots. Avoid overexposing, which can result in loss of detail.
Locking Focus and Exposure: For more control, lock the focus and exposure. This is particularly helpful in challenging lighting situations or when shooting moving subjects. Usually, a long press on the screen will lock both focus and exposure.
Editing Like a Pro: Enhancing Your Mobile Photos
Editing is a crucial step in elevating your mobile photography. A few simple adjustments can transform a good photo into a great one. Numerous editing apps are available, offering a range of features from basic adjustments to advanced tools. Choose one that suits your needs and skill level.
Start with the basics. Adjust brightness and contrast to optimize the overall tonal range of your image. Fine-tune highlights and shadows to recover detail in overexposed or underexposed areas. White balance correction can ensure accurate color representation.
Explore more advanced tools. Experiment with saturation and vibrance to enhance colors. Sharpness adjustments can bring out fine details. Consider using selective editing tools to make targeted adjustments to specific parts of your image.
Less is often more. Avoid over-editing. Subtle enhancements are usually more effective than drastic changes. Strive for a natural look that preserves the integrity of your original photo.
Essential Accessories for Mobile Photography
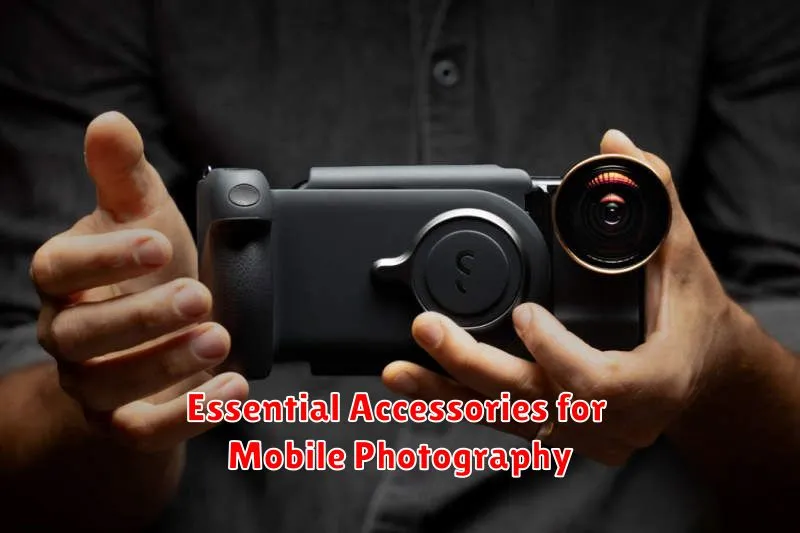
While your phone’s built-in camera is powerful, a few key accessories can significantly enhance your mobile photography game. Consider these additions for elevated results:
Tripods for Stability
Tripods eliminate shaky hands, essential for sharp images, especially in low light or when using slower shutter speeds. A small, flexible tripod is ideal for mobile use.
External Lenses for Creative Options
External lenses clip onto your phone, offering options like wide-angle, macro, and telephoto capabilities. These lenses expand your creative possibilities, allowing you to capture different perspectives.
Portable Lighting for Enhanced Illumination
Portable LED lights provide additional illumination when natural light is insufficient. These compact lights can dramatically improve image quality in challenging lighting conditions.
Gimbal Stabilizer
A gimbal stabilizer helps create smooth, professional-looking videos by minimizing unwanted camera shake. This accessory is especially useful for capturing moving subjects or when shooting while walking.
Tips for Shooting Videos on Your Phone
Transform your smartphone into a powerful video recording tool with these essential tips. Shooting compelling video on your phone is more accessible than ever with a few simple techniques.
Maintaining Stability
Stability is paramount for professional-looking videos. Avoid shaky footage by using both hands to hold your phone or investing in a small tripod for optimal steadiness.
Controlling Focus and Exposure
Just as with photos, focus and exposure are crucial. Tap the screen to set your focus point and adjust exposure by sliding your finger up or down. Lock these settings to prevent unwanted shifts during recording.
Considering Lighting and Sound
Natural light is your friend. Film in well-lit areas and be mindful of the direction of the light source. Minimize background noise for clearer audio and consider using an external microphone for optimal sound quality.
Exploring Frame Rates and Resolution
Experiment with different frame rates and resolutions to achieve desired effects. Higher frame rates (e.g., 60fps) are ideal for slow-motion footage, while lower frame rates (e.g., 24fps) create a more cinematic feel.
Sharing and Showcasing Your Work

Once you’ve captured and edited your stunning mobile photos and videos, it’s time to share them with the world. Choosing the right platform is key to maximizing your reach and impact.
Choosing the Right Platform
Consider your target audience and the type of content you create. Social media platforms like Instagram are ideal for visual storytelling and engaging with a broad audience. For a more professional presentation, consider online portfolios or dedicated photography websites like Flickr or 500px. These platforms allow for higher resolution image uploads and often cater to a more discerning audience.
Crafting Compelling Captions and Titles
Don’t underestimate the power of a well-written caption or title. Provide context, share the story behind the image, or use relevant hashtags to increase discoverability. Engaging captions can spark conversations and build a loyal following.
Building Your Online Presence
Consistency is key to building a strong online presence. Regularly share your best work and interact with your followers. Participate in online communities and photography challenges to connect with other photographers and gain valuable feedback.